
テストも兼ねてQiitaとのマルチ投稿です。
はじめに
CentOS 7.7 に MySQL 8.0 をインストールしたメモです。
環境はこんな感じです。
[root@documize ~]# cat /etc/redhat-release
CentOS Linux release 7.7.1908 (Core)

[root@documize ~]# uname -a
Linux documize 3.10.0-1062.1.2.el7.x86_64 #1 SMP Mon Sep 30 14:19:46 UTC 2019 x86_64 x86_64 x86_64 GNU/Linux

[root@documize ~]# dmidecode | grep "Product Name"
 Product Name: Alibaba Cloud ECS
不要なリソースの削除
CentOS7系はMariaDBがデフォルトになっているので一応削除しておきます。
[root@documize ~]# rpm -qa | grep mariadb
mariadb-libs-5.5.64-1.el7.x86_64
[root@documize ~]# yum remove mariadb-libs
インストール
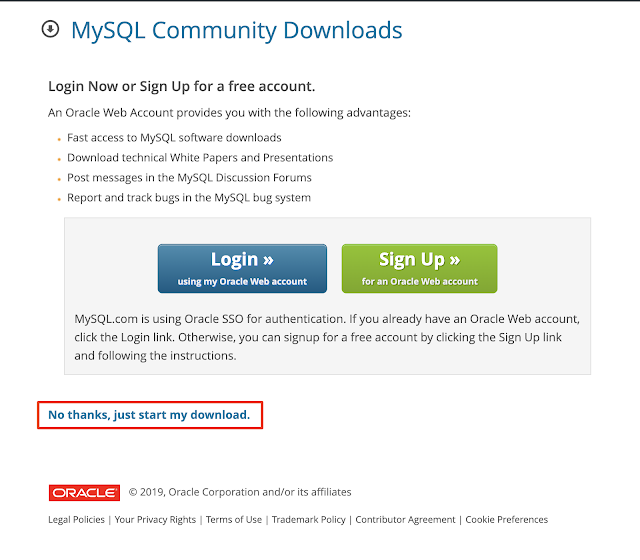
MySQL の公式Yumリポジトリの設定。
https://dev.mysql.com/downloads/repo/yum/
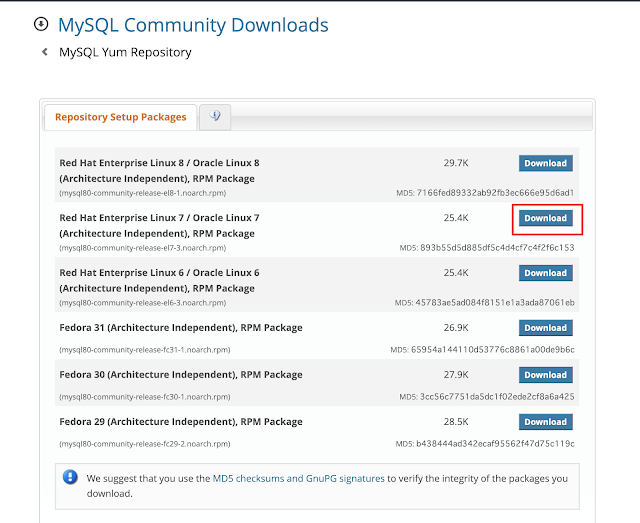
以下のリンクをコピーしてサーバー上でファイルを取得します。
[root@documize ~]
・・・省略・・・
インストール:
mysql80-community-release.noarch 0:el7-3
完了しました!
[root@documize ~]
mysql-connectors-community/x86_64 MySQL Connectors Community 131
mysql-tools-community/x86_64 MySQL Tools Community 100
mysql80-community/x86_64 MySQL 8.0 Community Server 145
[root@documize ~]
有効な MySQL リポジトリの確認
[root@documize ~]# yum repolist all | grep mysql
mysql-cluster-7.5-community/x86_64 MySQL Cluster 7.5 Community      無効
mysql-cluster-7.5-community-source MySQL Cluster 7.5 Community - So 無効
mysql-cluster-7.6-community/x86_64 MySQL Cluster 7.6 Community      無効
mysql-cluster-7.6-community-source MySQL Cluster 7.6 Community - So 無効
mysql-cluster-8.0-community/x86_64 MySQL Cluster 8.0 Community      無効
mysql-cluster-8.0-community-source MySQL Cluster 8.0 Community - So 無効
mysql-connectors-community/x86_64  MySQL Connectors Community       有効:    131
mysql-connectors-community-source  MySQL Connectors Community - Sou 無効
mysql-tools-community/x86_64       MySQL Tools Community            有効:    100
mysql-tools-community-source       MySQL Tools Community - Source   無効
mysql-tools-preview/x86_64         MySQL Tools Preview              無効
mysql-tools-preview-source         MySQL Tools Preview - Source     無効
mysql55-community/x86_64           MySQL 5.5 Community Server       無効
mysql55-community-source           MySQL 5.5 Community Server - Sou 無効
mysql56-community/x86_64           MySQL 5.6 Community Server       無効
mysql56-community-source           MySQL 5.6 Community Server - Sou 無効
mysql57-community/x86_64           MySQL 5.7 Community Server       無効
mysql57-community-source           MySQL 5.7 Community Server - Sou 無効
mysql80-community/x86_64           MySQL 8.0 Community Server       有効:    145
mysql80-community-source           MySQL 8.0 Community Server - Sou 無効
[root@documize ~]#
MySQL Server のインストール
[root@documize ~]# yum -y install mysql-community-server

・・・省略・・・

インストール:
  mysql-community-server.x86_64 0:8.0.18-1.el7

依存性関連をインストールしました:
  libaio.x86_64 0:0.3.109-13.el7               mysql-community-client.x86_64 0:8.0.18-1.el7
  mysql-community-common.x86_64 0:8.0.18-1.el7 mysql-community-libs.x86_64 0:8.0.18-1.el7

完了しました!
[root@documize ~]# mysqld --version
/usr/sbin/mysqld  Ver 8.0.18 for Linux on x86_64 (MySQL Community Server - GPL)
MySQLの起動
systemctl コマンドでMySQLを起動します。
[root@documize ~]# sudo systemctl start mysqld
[root@documize ~]# sudo systemctl status mysqld
● mysqld.service - MySQL Server
   Loaded: loaded (/usr/lib/systemd/system/mysqld.service; enabled; vendor preset: disabled)
   Active: active (running) since 火 2019-12-24 14:59:39 CST; 9s ago
     Docs: man:mysqld(8)
           http://dev.mysql.com/doc/refman/en/using-systemd.html
  Process: 24160 ExecStartPre=/usr/bin/mysqld_pre_systemd (code=exited, status=0/SUCCESS)
 Main PID: 24236 (mysqld)
   Status: "Server is operational"
   CGroup: /system.slice/mysqld.service
           └─24236 /usr/sbin/mysqld

12月 24 14:59:33 documize systemd[1]: Starting MySQL Server...
12月 24 14:59:39 documize systemd[1]: Started MySQL Server.
[root@documize ~]#
テンポラリーパスワードが発行されるのでログファイルから発行されたパスワードを確認します。
以下のようなメッセージがあるはずです。
A temporary password is generated for root@localhost: <テンポラリーパスワード>
以下の例で行くとbp.ic3sqpypLがテンポラリーパスワードになります。
[root@documize ~]# grep 'temporary password' /var/log/mysqld.log
2019-12-24T06:59:36.001898Z 5 [Note] [MY-010454] [Server] A temporary password is generated for root@localhost: bp.ic3sqpypL
[root@documize ~]#
mysql_secure_installation
新しいパスワードの設定とセキュリティの強化(匿名ログインの削除など)を行います。
[root@documize ~]# mysql_secure_installation

Securing the MySQL server deployment.

Enter password for user root: 【bp.ic3sqpypLを使用】

The existing password for the user account root has expired. Please set a new password.

New password:

Re-enter new password:
The 'validate_password' component is installed on the server.
The subsequent steps will run with the existing configuration
of the component.
Using existing password for root.

Estimated strength of the password: 100
Change the password for root ? ((Press y|Y for Yes, any other key for No) : y

New password:

Re-enter new password:

Estimated strength of the password: 100
Do you wish to continue with the password provided?(Press y|Y for Yes, any other key for No) : y
By default, a MySQL installation has an anonymous user,
allowing anyone to log into MySQL without having to have
a user account created for them. This is intended only for
testing, and to make the installation go a bit smoother.
You should remove them before moving into a production
environment.

Remove anonymous users? (Press y|Y for Yes, any other key for No) : y
Success.


Normally, root should only be allowed to connect from
'localhost'. This ensures that someone cannot guess at
the root password from the network.

Disallow root login remotely? (Press y|Y for Yes, any other key for No) : y
Success.

By default, MySQL comes with a database named 'test' that
anyone can access. This is also intended only for testing,
and should be removed before moving into a production
environment.


Remove test database and access to it? (Press y|Y for Yes, any other key for No) : y
 - Dropping test database...
Success.

 - Removing privileges on test database...
Success.

Reloading the privilege tables will ensure that all changes
made so far will take effect immediately.

Reload privilege tables now? (Press y|Y for Yes, any other key for No) : y
Success.

All done!
[root@documize ~]#
MySQL ログイン
先ほど作成した新しいパスワードでMySQLへログインします。
無事にログインできればMySQLのバージョンなどが表示されると思います。
[root@documize ~]# mysql -u root -p
Enter password:
Welcome to the MySQL monitor.  Commands end with ; or \g.
Your MySQL connection id is 11
Server version: 8.0.18 MySQL Community Server - GPL

Copyright (c) 2000, 2019, Oracle and/or its affiliates. All rights reserved.

Oracle is a registered trademark of Oracle Corporation and/or its
affiliates. Other names may be trademarks of their respective
owners.

Type 'help;' or '\h' for help. Type '\c' to clear the current input statement.

mysql> status
--------------
mysql  Ver 8.0.18 for Linux on x86_64 (MySQL Community Server - GPL)

Connection id:  11
Current database:
Current user:  root@localhost
SSL:   Not in use
Current pager:  stdout
Using outfile:  ''
Using delimiter: ;
Server version:  8.0.18 MySQL Community Server - GPL
Protocol version: 10
Connection:  Localhost via UNIX socket
Server characterset: utf8mb4
Db     characterset: utf8mb4
Client characterset: utf8mb4
Conn.  characterset: utf8mb4
UNIX socket:  /var/lib/mysql/mysql.sock
Uptime:   32 min 13 sec

Threads: 2  Questions: 18  Slow queries: 0  Opens: 131  Flush tables: 3  Open tables: 48  Queries per second avg: 0.009
--------------
ちなみにvalidate_passwordで何が設定されているかは以下になります。
mysql> SHOW VARIABLES LIKE "validate_password%";
+--------------------------------------+--------+
| Variable_name                        | Value  |
+--------------------------------------+--------+
| validate_password.check_user_name    | ON     |
| validate_password.dictionary_file    |        |
| validate_password.length             | 8      |
| validate_password.mixed_case_count   | 1      |
| validate_password.number_count       | 1      |
| validate_password.policy             | MEDIUM |
| validate_password.special_char_count | 1      |
+--------------------------------------+--------+
7 rows in set (0.00 sec)
文字コードの確認
mysql> show variables like "chara%";
+--------------------------+--------------------------------+
| Variable_name            | Value                          |
+--------------------------+--------------------------------+
| character_set_client     | utf8mb4                        |
| character_set_connection | utf8mb4                        |
| character_set_database   | utf8mb4                        |
| character_set_filesystem | binary                         |
| character_set_results    | utf8mb4                        |
| character_set_server     | utf8mb4                        |
| character_set_system     | utf8                           |
| character_sets_dir       | /usr/share/mysql-8.0/charsets/ |
+--------------------------+--------------------------------+
8 rows in set (0.00 sec)
とりあえずここまででインストールは完了です。


